Adding Clip Sweeps
A number of scripted animation effects, such as clip sweeps, can be added automatically to a keyframe in an animated sequence.
The following clip sweeps are available:
| Description | |
|---|---|
|
Clip sweep along X axis |
Creates a clip sweep along the X axis of the selected dataset from +X to -X and then back to +X. |
|
Clip sweep along X- axis |
Creates a clip sweep along the X axis of the selected dataset from -X to +X and then back to -X. |
|
Clip sweep along Y axis |
Creates a clip sweep along the Y axis of the selected dataset from +Y to -Y and then back to +Y. |
|
Clip sweep along Y- axis |
Creates a clip sweep along the Y axis of the selected dataset from -Y to +Y and then back to -Y. |
|
Clip sweep along Z axis |
Creates a clip sweep along the Z axis of the selected dataset from +Z to -Z and then back to +Z. |
|
Clip sweep along Z- axis |
Creates a clip sweep along the Z axis of the selected dataset from -Z to +Z and then back to -Z. |
* See Clipping for more information about clipping in 3D views.
- Select the keyframe that you want to add the clip sweep to.
Note If your animated sequence includes multiple objects, make sure that the object you want add the clip sweep to is selected in the Data Properties and Settings and panel.
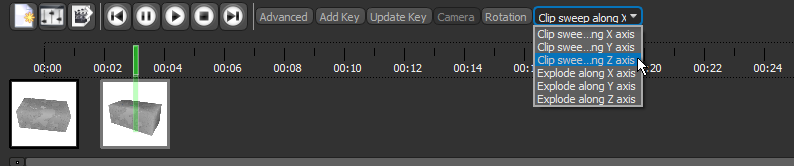
- Select the required Clip Sweep option in the drop-down menu, as shown below.
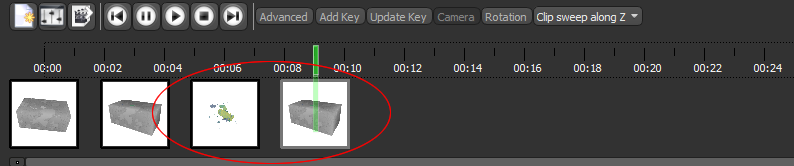
Two keyframes, circled below, are added automatically to the timeline. The first represents the midpoint of the clip sweep, and will be blank if there is only object in the animated sequence, while the second represents the end point. This keyframe will be identical to the original keyframe.
- Preview your changes to the animated sequence (see Previewing Animated Sequences).


